products-tutorial

#All
Setup LONGER Laser engraver and material selection

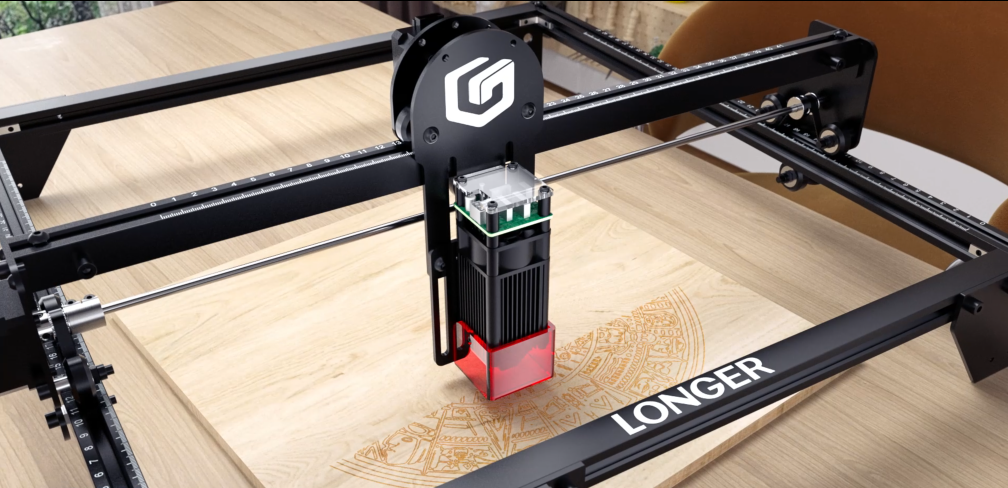
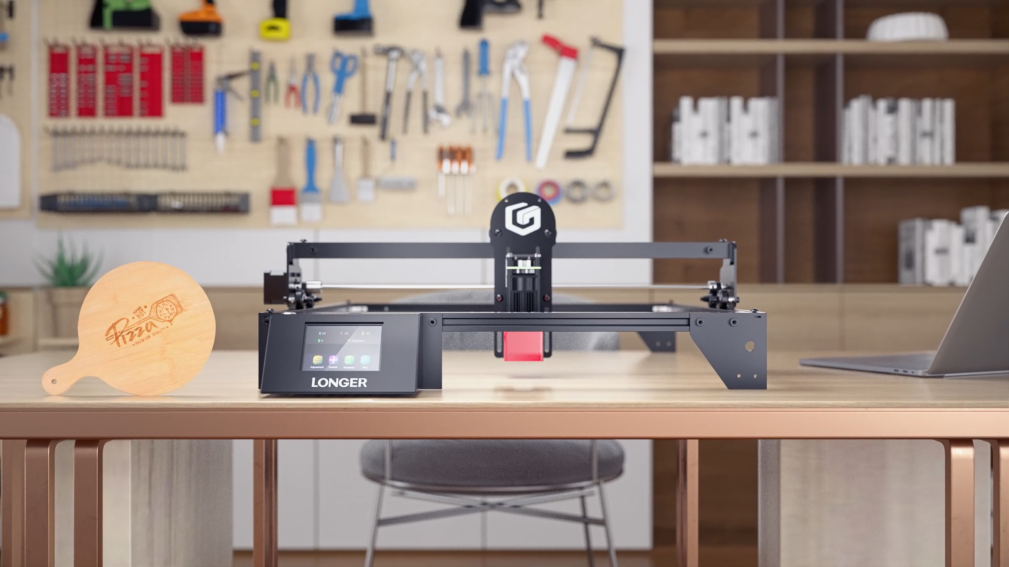
LONGER laser engravers employ highly accurate technology, using focused laser beams to cut various materials with precision. This process is vital in both development and production. To effectively execute laser cutting, one must understand the principles, material selection, design, machine operation, and safety measures. The LaserB1 and Ray5 series, are renowned for their performance in laser cutting. Operating a LONGER laser cutting machine involves several key steps:

Machine Setup: 
Start with put LONGER laser engraver in right place. Make sure the area can provide sufficient space for air access to the device and that it also stands on solid ground. The device can go on working at full capacity under such conditions. Attach the machine to the power source and test any fail-safe features like the emergency stop button and guard lock by pressing the emergency stop button and confirming the machine's reaction. 


The laser must be placed in an acceptable environment to reduce unintentional or unplanned disasters. The environment should be well-ventilated, stable, and clean to prevent shaking/vibration of the machine. The electrical source should be a per the maker's standards whereas it has to be earth and insulation grounded. The machine set up process should be carried out within the actual configuration of its laser beam deliver components and these components should be cleaned regularly. Software such as LaserGRBL LaserBurn LightBrun, MKS app and controls need to compatible to the operating system. First step of calibration and test of machine should be performed by adopting steps defined in machine manual.

Material Selection and Preparation: 
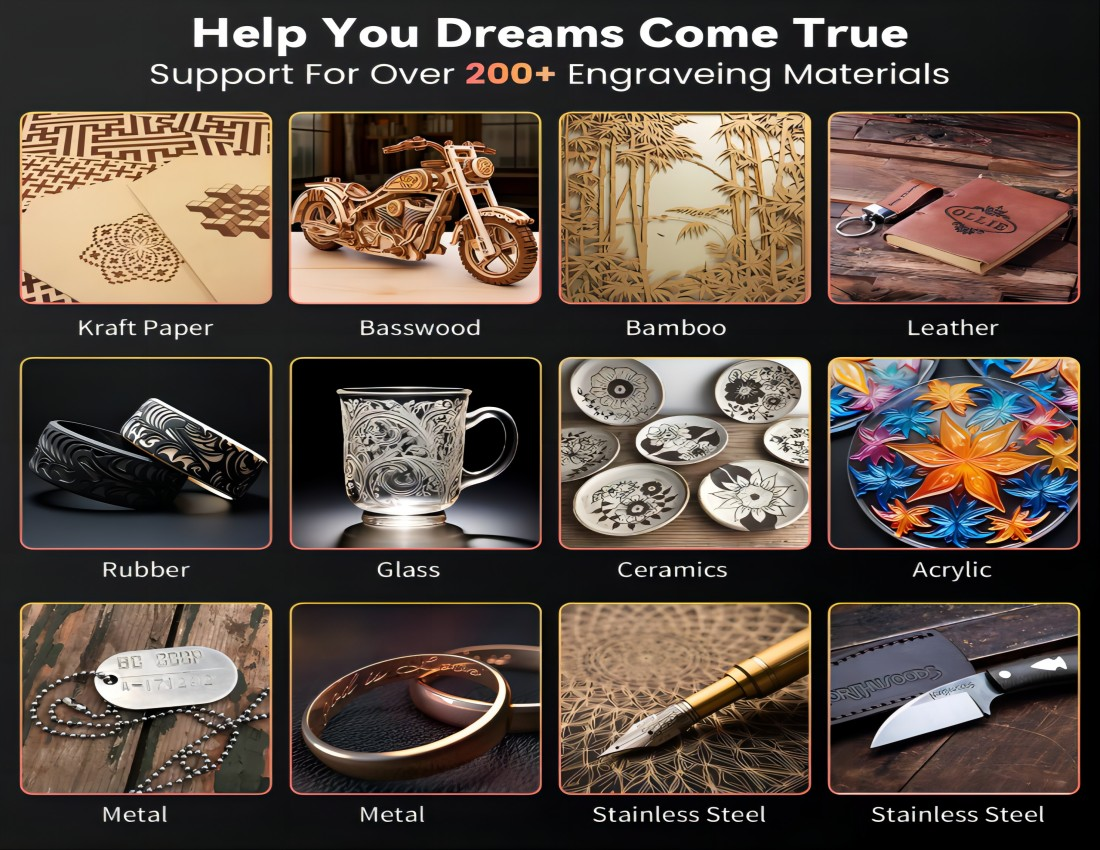
Choose the most compatible option out of many options for your laser cutting task in a proper way. The laser cutter machine (WEED) is very versatile since it can handle different materials like wood, acrylic, leather, metal, and fabric, just to name a few. The initial step involves preparing the front assembly by removing dust, smoothing out any imperfections, and securely mounting it onto the operating area board. Utilize masking tape to protect the surface and the soot from accidental damage.


The rectification of laser machining involves defining the material's characteristics, including its reaction to laser wavelength and energy level, and ensuring safety measures. Material properties like hardness, melting point, and thermal conductivity influence the process outcome. Thicker materials may require multiple passes. Proper material surface preparation, such as cleaning and degreasing, is crucial for effective laser processing. Safety considerations include adherence to laser safety protocols, the use of approved personal protective equipment (PPE), hazard awareness, and implementing ventilation or filtration systems. Refer to the LONGER laser machine's specifications, guidelines, and standards for material selection and processing operations.


By products-tutorial | April 25, 2024
The Power of Precision: Understanding the Differences Between Red and Blue Laser Engraving Machines

Red and blue lasers are two prevalent choices in the engraving machine market, each equipped with distinct laser heads. These laser heads offer unique performance characteristics and applications. By comprehending the disparities between red and blue lasers, we can make informed decisions to enhance production efficiency and quality. This article delves into the variances between red and blue laser engraving machines, using the LONGER RAY5 20W laser engraving machine and the LONGER Ruby Pulsed Infrared Laser Module as a case study.

Features of red laser engraving machine
Red light laser engraving machines usually use longer wavelength red light as the engraving light source, which has higher penetrating power and larger spot diameter. This makes it excellent at handling thicker materials such as wood, leather, and certain non-metallic materials. In addition, red light laser engraving machines also have high engraving speed and low cost, so they are popular in mass production and rapid prototyping.

Application of red laser engraving machine
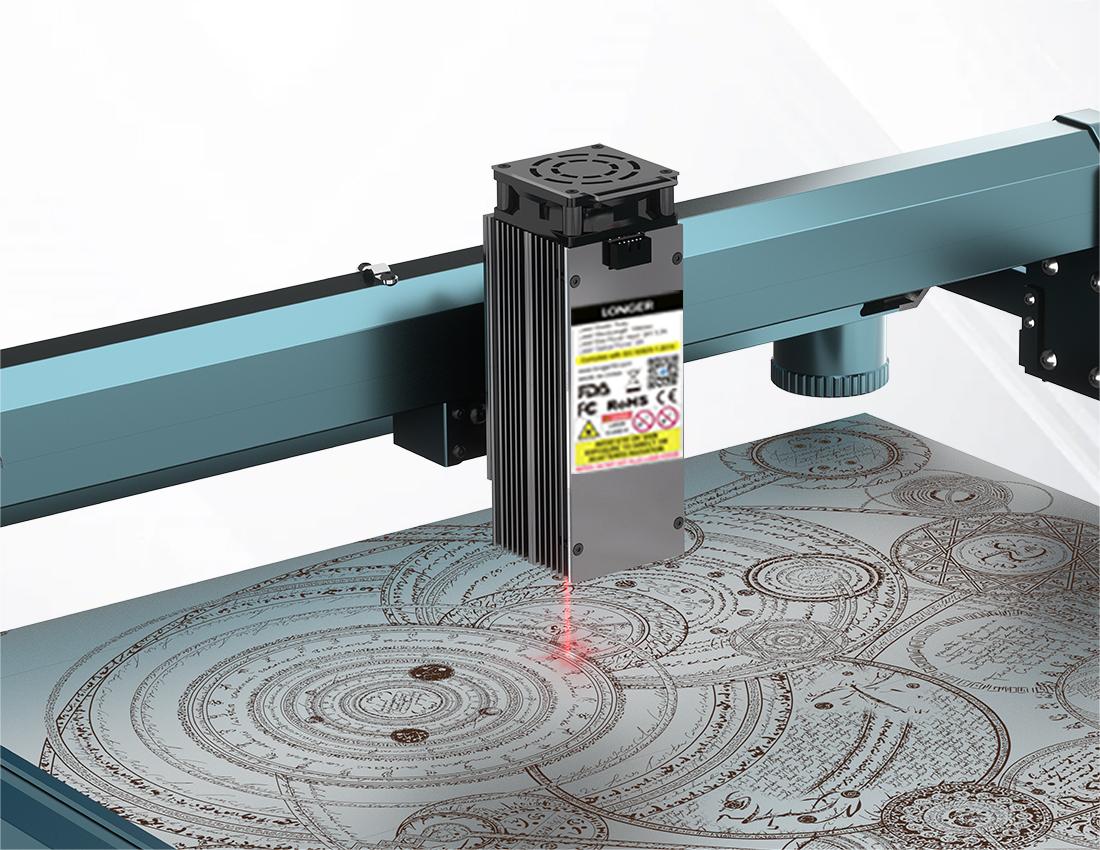
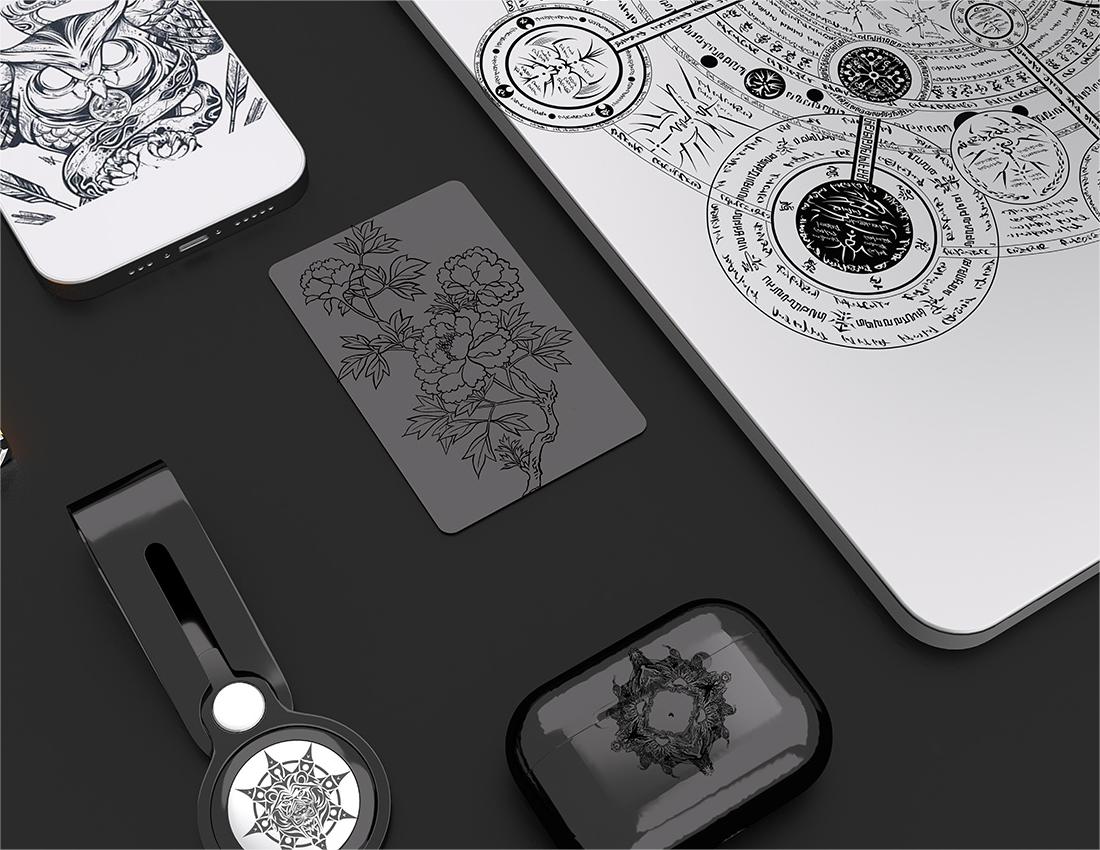
LONGER Ruby PulsedInfrared Laser Module is a red laser head developed by the LONGER team. It uses advanced technology and an ultra-fine laser spot size of 0.03*0.03mm, which can easily achieve complex details down to millimeters, and can be produced on metals, plastics, etc. Perfect carving. LONGER Ruby has unparalleled engraving capabilities from metals and alloys such as iron, copper, aluminum, magnesium, zinc, gold, silver and titanium to other materials such as metal oxides, plated surfaces, ABS, inks and epoxies. When the laser engraving comes to engraving on glass, the choice of LONGER Ruby Pulsed Infrared Laser Module ensures seamless engraving without any tinting, showcasing its remarkable efficiency and speed in completing tasks while maintaining the clarity and precision of the design. Particularly suitable for scenarios requiring processing of thick materials and large-scale production, for instance, in industries like engineering and leather product manufacturing, Ruby Pulsed Infrared Laser Module offer unmatched efficiency in completing engraving tasks, thereby significantly enhancing overall production efficiency.

Features of blue laser engraving machine
Blue light laser engraving machines use shorter wavelength blue light as the engraving light source, with higher resolution and smaller spot diameter. This makes it excellent at handling thin materials such as paper, plastic and metal films. Blue light laser engraving machines also have high engraving accuracy and low heat output, so they have advantages in fine engraving and high-precision cutting.Longer's LaserB1 series and Ray5 laser engraving machines represent prime examples of blue laser engraving technology, maintaining their blue laser functionality without the need for a laser head change.

Application of blue laser engraving machine
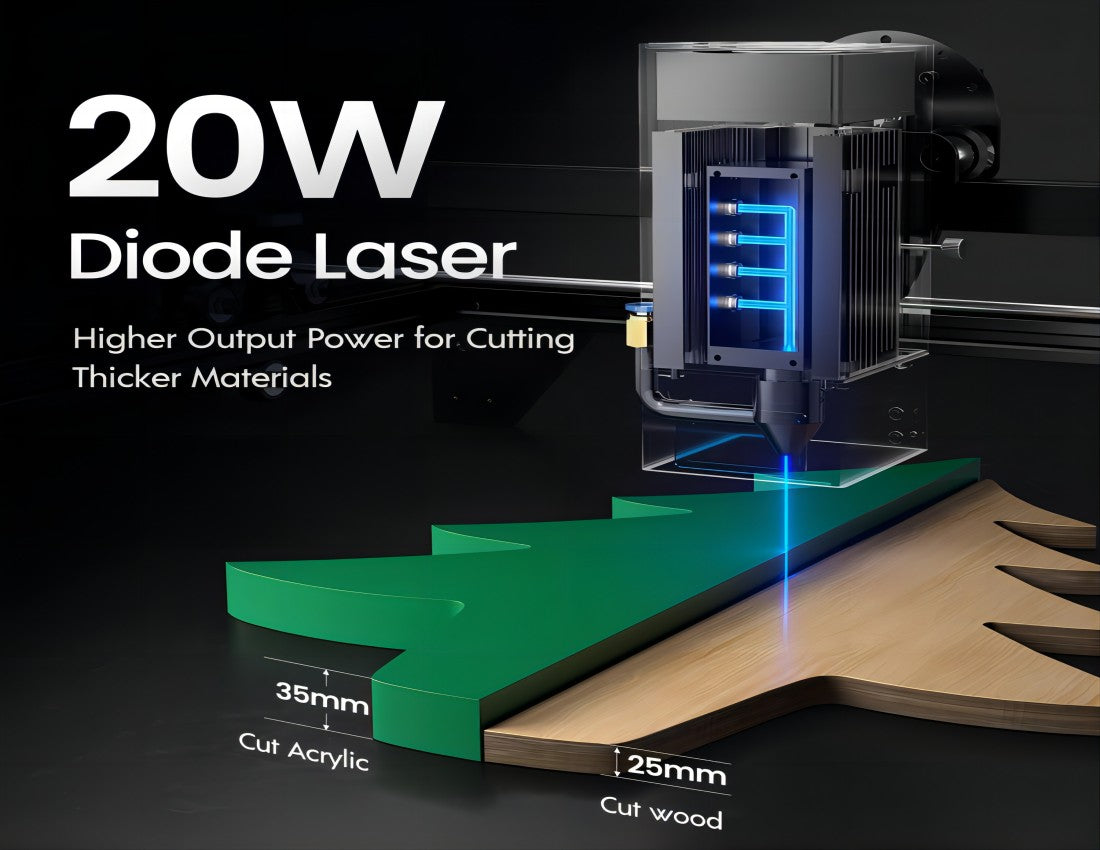
LONGER RAY5 20W  blue light laser engraving machine is a four-core diode laser with 22-24W output power and strong cutting ability. Its ultra-fine 0.08*0.1mm focus and 10000mm/min burning speed can effectively engrave on metal surfaces. Achieve multi-color engraving, and support multiple connection options, such as WIFI, APP, USB and TF card. For scenes that require fine engraving and high-precision cutting, blue-ray laser engraving machines have more advantages. They can easily achieve detailed engraving while avoiding material deformation due to high temperatures. For example, in the electronics industry, precision instrument manufacturing and other fields, blue-ray laser engraving machines can achieve high-precision engraving and cutting to meet product accuracy requirements. In addition, blue light laser engraving machines are also widely used in art production, anti-counterfeiting markings and other fields.

Conclusion

Red light and blue light laser engraving machines each have their own unique advantages and application scenarios. When choosing a laser engraving machine, creators should choose the appropriate model according to specific needs. Understanding the differences between red light and blue light is of great significance for us to choose the appropriate and accessories equipment. With 8 years of professional research in laser engraving machines, LONGER is committed to advancing the research, development, and application of laser engraving technology, delivering technological innovation and economic benefits to various industries. In the future field of laser engraving, the power of precision will continue to lead us to broader application prospects. 


By products-tutorial | April 10, 2024
Troubleshooting Common Issues with Ray5 20W Laser Cutter

The LONGER Ray5 20W laser engraving machine is a powerful and versatile tool widely used for cutting and engraving a variety of materials. However, like any precision device, users may occasionally encounter technical issues that affect performance and workflow efficiency.

Understanding how to identify and resolve these common problems is essential for maintaining consistent output quality and ensuring long-term machine stability. This guide outlines the most frequently encountered issues with the Ray5 20W and provides practical troubleshooting solutions.

Poor Cutting Precision

One of the most common issues is inaccurate or inconsistent cutting results.

Possible causes:

  • Loose belts or mechanical components
  • Improper focus adjustment
  • Incorrect machine calibration
  • Unstable working surface

Solutions:

  • Tighten belts and check all mechanical connections
  • Recalibrate the laser module and ensure proper focusing
  • Level the working bed before operation
  • Secure the material firmly to prevent movement

Maintaining mechanical stability is key to achieving precise cutting results.

Insufficient Engraving Depth

If engraving appears too light or shallow, the issue is often related to energy output or settings.

Possible causes:

  • Low laser power setting
  • Incorrect speed configuration
  • Dirty or obstructed lens

Solutions:

  • Increase laser power gradually
  • Reduce engraving speed for deeper marking
  • Clean the laser lens regularly to ensure optimal beam transmission

Proper parameter adjustment is critical for achieving consistent engraving depth.

Software Connection Issues

Connectivity problems between the laser cutter and control software can interrupt workflow.

Possible causes:

  • Faulty USB cable or connection port
  • Driver installation errors
  • Incompatible software version

Solutions:

  • Replace or reconnect USB cables
  • Reinstall device drivers
  • Ensure software is updated and compatible with the Ray5 system

Stable communication between software and hardware is essential for reliable operation.

Burn Marks or Excessive Charring

Burnt edges or excessive charring can affect the quality of finished work.

Possible causes:

  • Excessive laser power
  • Slow engraving speed
  • Poor airflow or ventilation

Solutions:

  • Reduce power settings appropriately
  • Increase engraving speed
  • Improve ventilation or use an exhaust system

Balancing power and speed is key to clean engraving results.

Lens Contamination or Degradation

A dirty or damaged lens can significantly reduce laser performance.

Possible causes:

  • Dust buildup during operation
  • Smoke residue accumulation
  • Lack of regular maintenance

Solutions:

  • Clean the lens using recommended cleaning tools
  • Inspect regularly for damage or wear
  • Replace the lens if necessary

Routine maintenance ensures long-term performance stability.

Conclusion

While the LONGER Ray5 20W laser cutter is designed for reliability and precision, proper maintenance and correct operational settings are essential for optimal performance. Most common issues can be resolved through simple adjustments, regular cleaning, and proper calibration.

By understanding these troubleshooting methods, users can minimize downtime, improve engraving quality, and ensure smooth, efficient operation across a wide range of projects.


By products-tutorial | April 9, 2024
How to operate RAY5 Laser engraving machine

LaserBurn is a powerful mobile application designed specifically for LONGER laser engraving machine users, including the Nano and B1 series. It is developed to improve both convenience and control, allowing users—whether beginners or professionals—to operate their laser engraving machines directly from a smartphone.

With LaserBurn, users can streamline workflow, reduce setup complexity, and enjoy a more flexible engraving experience without relying entirely on desktop software.

What LaserBurn Can Do

The LaserBurn app enables users to:

  • Control LONGER laser machines directly via smartphone
  • Adjust engraving and cutting parameters remotely
  • Monitor machine status in real time
  • Improve workflow efficiency for both beginners and advanced users

This mobile-first approach makes laser engraving more accessible and flexible than ever before.


STEPS Calibrating Laser
a.Place the machine on a flat table and make sure that the machine is stable and will not shake.
b.Place the wood board to be engraved or cut under the laser
c.Loosen the two thumb screws on the front of laser head by hand. Then place the focusing column vertically on the bottom of the laser head form the rear side, and manually lift the laser head so that the bottom of the rear side of the laser is close to the upper surface of the calibration column.
d.Tihten the two laser thumbscrews, then remove the focusing column


Power Up
a.Find the adapter and power cable and connect them.
b.Connect the power cord to the power supply and connect the other end of the adapter to the power port of the motherboard.
c.Connect the computer and the engraving machine through a USB computer (or insert a Micro SD card).
d.To Turn ON your RAY5 by press the power switch (To Turn OFF your RAY5 by press the power switch once again.)
Touch Screen Operation
RAY5 has a full-color 3.5-inch touch screen with a user-friendly user interface. Engraving and cutting work can be operated with touch screen and SD card.


Alt image
Wi-Fi Control operation
Enter the IP address in the browser of mobile phone or computer, then the control interface will pop up
Alt image


LaserGRBL Software Operation and SetupLaserGRBL is an easy-to-use and fully free software for laser engraver only running on Windows.
a.Find LaserGRBL software in attached SD card(path:/software),Or download from the link: https://lasergrbl.com/download/
b.After installing laserGRBL, power up the RAY5, press the power switch button, and connect the laser engraver and computer via USB cable.
c.Open LaserGRBL, select correct port(depend on your PC), baud rate: 115200. Then click connect button.(If you cannot find correct port, please install CH340 driver manually by click Menu >> Tools >> Install CH340 Driver in LaserGRBL)
Usage1.Main Interface
Alt image


2.Open file and set parameters
Alt image


Alt image


3.Start to engrave
Place a board under the laser, then calibrate the laser.
Move the laser head to the place you want.
Click “Frame” button to check the work frame.
Click button to start engraving.
Alt image


Or you can save gcode file to SD card by click “File” >> “Quick Save” for offline workingMore help information about LaserGRBL, please refer to the link: https://lasergrbl.com/usage/
Alt image


LightBurn Software Operation and setupLightBurn is a professional software for engraver, a charging software running on Windows, macOS, and Linux. It provides a trial period. You could pay for it afterward if you like it.
a.Find Lightburn software in SD card(path: /software) came with the package. Or just download from the link:https://lightburnsoftware.com/download/
b.After installing Lightburn, power up the RAY5, press the Power Switch button, and connect the laser engraver and computer via USB cable.
c.For the first time launching LightBurn, it will prompt a “New Device Wizard” for help you setup machine.
d.Select GRBL form the list, then click “Next” button
Alt image


e.Select Serial/USB and press “Next” button.


Alt image


f.Fill your Device Name, X, Y axis, then click “Enter” button
Name: RAY5
X = 400
Y = 400
g.Select “Front Left” as your Origin X,Y and activate “Auto ‘Home’”, then click “Next” button.
Alt image


h.Select RAY5 and press Make Default. Your RAY5 is ready to be used in LightBurn software.
Main interface
Alt image


Select correct port(depends on your PC), then the RAY5 is connected to the computer.
Alt image


Click Menu “File” >> “Import image from disk.” Or just use draw tool on left column to design your own pattern
Alt image


Set the name, speed, maximum power, mode, and other parameters in the cutting/layer; (engraving function and cutting function are only different in speed, power. Normally, the cutting speed parameter is slower)
Alt image


After placing the board under the laser, click Frame to check the laser path whether is completely inside of the board.
Click “Start” to start to work.
Or you can save gcode file to SD card by click “Save GCode” button in Laser panel for offline working
Alt image


More help information about lightburn, please refer to the link: https://lightburnsoftware.com/pages/tutorials
APP Operation
RAY5 can be controlled or engraved through MKSLaser APP when the engraver and APP are connected to the same WIFI.
Please search for "MKSLaser" in Google play or app store or visit the address below to download Android system https://play.google.com/store/apps/details?id=makerbase.com.mks laser
Please search for "MKSLaser" in the app store or visit the address below to download https://apps.apple.com/us/app/mkslaser/id1542756280?uo=4&at= 11l6hc&app=itunes&ct=fnd for Apple system
Alt image

LaserBurn significantly improves the usability and accessibility of LONGER laser engraving machines by bringing core controls directly to mobile devices. Combined with traditional software options like LaserGRBL and LightBurn, users can choose the most suitable workflow for their skill level and project requirements.

Whether you are a beginner exploring laser engraving or a professional managing detailed production work, LaserBurn provides a more intuitive and efficient way to operate LONGER machines.

By products-tutorial | April 7, 2024
Tips for engraving glass using laser engraving machine

Laser engraving on glass using diode technology is a versatile craft that finds its place in contemporary artistry and manufacturing. In the realm of art creation, this technique empowers artists to intricately etch stunning patterns, text, and textures onto glass surfaces, crafting exquisite sculptures, decorative pieces, and more. Similarly, diode laser engraving is a staple in manufacturing, facilitating the production of ornaments, accessories, and personalized gifts with unparalleled precision and customization options, meeting the demand for top-quality craft products in the market.

Longer's diode laser engraving serves as an efficient solution for personalized engraving services, offering tailored options for souvenirs, trophies, and keepsakes from 2016. In architecture, Longer lends itself to the decoration and customization of glass elements in buildings, infusing spaces with unique artistic flair and bespoke designs. With its attributes including precision, automation, versatility in achieving various effects, and the ability to maintain glass surface smoothness, diode laser engraving emerges as a pivotal technology in glass processing and decoration, unlocking endless creative and manufacturing opportunities for creators and businesses alike.


Tip 1: Clean the Glass Surface Before Engraving

Cleaning the glass surface is a crucial first step before engraving. It not only helps ensure the accuracy and quality of the engraving but also prevents adverse effects during the process. Cleaning removes dirt, grease, and other impurities from the surface, ensuring that the laser can accurately irradiate the glass. Additionally, a clean glass surface aids in the uniform propagation of laser energy, avoiding excessive local heat that may cause glass breakage or uneven engraving effects. Therefore, it is essential to thoroughly clean the glass surface before engraving, using ethanol and a lint-free cloth to wipe it clean.

Tip 2: Apply Paint to the Engraved Glass Surface

Applying paint to the glass surface during engraving is a critical technique. By applying acrylic paint, the refraction of the laser is reduced, allowing the glass to absorb energy more fully and maintain stability during laser engraving. Additionally, spraying black paint or adhering colored paper is also a common method.

Tip 3: Clean the Engraved Glass Product

After waiting for the laser engraving to complete and cool down, use an appropriate solvent or cleaner (such as acetone, alcohol, or paint remover) to spray or apply it to the painted areas. These chemicals can typically dissolve the paint, making it softer and easier to remove. After spraying, gently wipe the painted areas with a soft cloth.

The above tips provide key techniques for achieving laser engraving on glass materials. LONGER is definitely a great helper for making glass decorations. Currently, the RAY5 and Laser B1 series machines have been released. The RAY5 series engraving machine is equipped with a 0.08*0.08mm compressed laser spot, which focuses energy more, perfectly combining simplicity with precision, making it an ideal choice for beginners entering the world of engraving and cutting. Meanwhile, the Laser B1 series machine boasts a engraving speed of up to 36000mm/min, standing out with its powerful functionality, meeting the needs of experienced creators proficient in engraving and cutting techniques.

Explore Ray5 20W at https://www.longer3d.com/products/ray5-20w-laser-engraver and Laser B1 30W https://www.longer3d.com/products/longer-laser-b1-30w-laser-engraver to learn more and elevate your glass engraving journey with Longer.

By products-tutorial | April 7, 2024
LONGER LaserBurn: Ideal companion for your laser engraving machine

LaserBurn Is a powerful APP designed for LONGER laser engraving machine users, designed for Nano and B1 series laser engraving machines, designed to enhance the user engraving experience and convenience. Both novice and professional, LaserBurn meets the needs of users to control laser engraving machines through mobile phones.

LaserBurn APP Users can directly control their own LONGER laser engraving machine from their smartphones, so what specifically can LaserBurn provide more convenient access and operation for the use of Longer Nano? Let me briefly introduce the steps to use LaserBurn APP:


Download and install the LaserBurnAPP:

To use LaserBurn, download the app. iOS users can search and download and install the LaserBurn app in App Store, while Android users can access and install the app in the Google Play store.

Connect the laser engraving:

Open the LaserBurn app and follow the app's instructions to connect the laser engraving machine to your smartphone. There are three ways to connect the device:

WiFi Direct connection: Turn on the long B1 power supply and connect the phone to a Wi-Fi network with the name " LongerLaser_. Wi-Fi password: 12345678. Open the Longer Laserburn app, click Unconnected, device management, and then enter the IP address 192.168.0.1 to connect to the app.

Scan Connection: Open the LaserBurn application, click Unconnected, and then click Add to scan and add the device. First, connect your phone to a Wi-Fi network called "LongerLaser_."Wi-Fi password: 12345678. Click the Set STA Mode, select the Wi-Fi network that you need to connect to, and establish a connection.

IP connection :touch screen users only.

Drawing creation:

LaserBurn The app has a powerful drawing tool built-in, allowing you to easily create your own designed patterns on your phone. In addition, you can import files from the SD card or carve material from the library.

Adjust the engraving parameters:

Users can preview the engraving effect in real time in the application and customize the engraving parameters as needed to achieve personalized engraving effects. Here are the carving and cutting parameters of some materials:

Carving parameters:

Tden wood: 10000; 80, hardwood: 10000; 100, alumina: 100; 100, leather: 24000; 35, denim: 11000; 25, wood: 15000; 90, pottery: 2000; 100, rock: 14000; 100, stainless steel: 1000; 100, paper: 6000; 15.

Cutting parameters:

Linden wood 3mm: 300; 100, linden wood 5 mmm: 150; 100, bubble tung wood 8mm: 50; 100, leather: 1300; 100, denim: 600; 100, paper: 3000; 100.

Start carving:

After the adjustment parameters are completed, the carved items are placed, and the APP application enters the preview mode, and the bracket height is adjusted. When the two laser points are combined into a focus point, the carving can begin. 

Overall, by using the LaserBurn APP, you can easily control the LONGER Nano and B1 series of laser engraving machines, achieving accurate engraving operation, and obtaining an efficient workflow. Download the LaserBurn APP now and start experiencing the unparalleled laser engraving experience! Click here to learn more on Longer official website.

By products-tutorial | March 29, 2024
Longer Nano Tutorial: Operational Guide and Innovative Applications of the World's First 12W Portable Laser Engraver

The Longer Nano, as a portable laser engraver, boasts a user-friendly operation. Initially, creators can consult the product manual to familiarize themselves with the accessories and install the laser engraving machine. Placing the Longer Nano on a smooth worktable, ensuring the absence of flammable materials nearby, and connecting the power supply precede pressing the boot button on the host handle to initiate the engraving process.

For first-time laser engraving machine users, downloading the LaserBurn app developed by the Longer team on mobile devices is recommended. LaserBurn, designed for Nano and B1 series laser engraving machines, enhances the convenience of using Longer laser engraving machines. The app's core functions include WiFi network connection, motion control, drawing creation, carving parameters, preview and settings, carving work information display, SD card file carving, carving history, material library, etc., meeting users' demand for mobile phone-controlled laser engraving machines. PC users can opt to download LightBurn or LaserGrbl software to connect and control their laser engraving machines. Once the desired laser engraving software is opened, users can follow the instructions to connect the equipment and control the Nano accordingly.

Within the laser engraving software, creators have the flexibility to adjust various parameters to achieve the desired engraving effect, including power, speed, depth, etc. Longer suggests conducting some simple engraving tests before adjusting the parameters to understand the impact of each parameter and find the optimal combination. Below are the carving and cutting parameters for some materials:

Carving Parameters:

- Tden Wood: 10000; 80

- Hardwood: 10000; 100

- Alumina: 100; 100

- Leather: 24000; 35

- Denim: 11000; 25

- Wood: 15000; 90

- Pottery: 2000; 100

- Rock: 14000; 100

- Stainless Steel: 1000; 100

- Paper: 6000; 15

Cutting Parameters:

- Linden Wood 3mm: 300; 100

- Linden Wood 5mm: 150; 100

- Bubble Tung Wood 8mm: 50; 100

- Leather: 1300; 100

- Denim: 600; 100

- Paper: 3000; 100

Before commencing carving, creators can manually adjust the focal length, position the carving items, adjust the height of the electric bracket, and measure with the range ruler to ensure the distance between the bottom of the field mirror and the object's surface is 150mm. Creators can also focus on the red light, position the carved objects, and enter preview mode through the app or PC application to adjust the bracket's height. When the two laser points synthesize a focal point to complete the ranging, creators can commence carving. It is essential to note the importance of using protective equipment, such as goggles and protective covers, to ensure safety when using the laser engraving machine. Creators should also remain vigilant of the equipment's running state and be prepared to halt operations to address any unexpected issues. 

Longer hope this guide will assist creators in utilizing the Nano and enjoying a high-quality carving experience. 

By products-tutorial | March 27, 2024
Longer Laserburn App - Longer B1  handbook
Longer Laserburn App - Longer B1 handbook

In the previous Longer Academy article, it was seen how to properly connect the Longer B1 with the Longer Laserburn app. After successfully completing the connection, you can start using the app to control the laser engraving and process the files to be engraved.


Longer Laserburn allows you to move the laser within the work area, switch the laser beam on and off, define the homing position, transfer files, start an engraving, monitor engraving information, enable air assist and so on. Thanks to Longer Laserburn, your Smartphone becomes not only a remote display for Longer B1, but also a powerful device for processing your work. After the connection is successful, remote use can be operated.


The Longer Laserburn Home screen shows at the top the current X/Y coordinates and the S intensity of the laser, while at the bottom there are some buttons to access the corresponding submenu.

1. Creation
It allows you to process an existomg image or create new image file, and slicing for engraving, exactly as you do when using desktop Lightburn, in an easy and comfortable way from your smartphone. The section “material” contains some sample images, to use as test engraving or test cutting; also, “text” will allow you to create some personalized messages, and it’s also possible build some QRcodes directly from app.

A.Import an image or create your personalized image file directly in app.

B.In the next step you can edit the image by manually setting brightness, contrast and other effects, including the dimensions and positions.

C.In the last step you can configure file engraving speed, laser power, M3/M4 mode and more, as fill or line mode, air assist, and many other settings exactly as you usually do with Lightburn for laptop. Like for Lightburn, you can set different Layer settings in Laserburn app, in order to set different parameters for each image to engrave.

D.After finishing adjusting the parameters, you can slice and upload it via WiFi to the B1 microSD. After B1 has received it successfully, you will enter the engraving page from which you can monitor the progress of the processing status.


2. Control
It allows you to move the laser module within the processing area and different steps and speed of movement can be set; you can also go back to homing, define a new homing position, turn the laser beam on and off, etc.


3. Material
There are some graphic samples to be used to determine the best parameters for engraving or cutting on different materials. Once you have chosen the image to carry out the various tests, set the various parameters (please refer to the "Creation" paragraph).


4. Files
The list of files on the microSD card inserted inside Longer B1 is shown, and you can select a file to engrave again.


5. History
This is the record of the files engraved or cut previously. You can monitor which files you engraved or cut already, and how many times you processed them already.

By products-tutorial | March 26, 2024
Tips for Laser Engraving Wooden Materials with Precision

Wooden materials are indeed popular for laser engraving due to their versatility in processing and wide range of applications in various industries. Whether engraving intricate designs on wooden signs, engraving personalized messages on wooden gifts, or creating custom signage for business, wood is ideal for laser engraving projects. Its natural texture and warm texture add unique beauty to carved products and are favored by consumers. However, due to the immaturity of the user's engraving technology, there are often consequences such as excessive material consumption and unsatisfactory engraving effects. Therefore, achieving precise engraving on wooden materials requires some skills and precautions.

Tips for Engraving Wooden Materials with Laser Engraving Machine

Here are some practical tips to help creator achieve precise laser engraving of wood materials:

  • Wood selection: Different types of wood have different densities and textures, which directly affect the effect of laser engraving. Therefore, you need to consider its texture, color and grain when choosing wood to ensure the final carving is as intended. Typically, solid, clear-grained woods are better suited for laser engraving because they provide clearer, more precise engraving results. In addition to common woods such as oak, cherry, and maple, you can also try some special materials, such as birch, walnut, etc., to increase the diversity and personalization of your works.
  • Adjust laser parameters: Laser power, speed, frequency and other parameter settings have a vital impact on the engraving effect. Depending on the type and thickness of the wood material selected, these parameters must be adjusted appropriately to ensure accuracy and consistency in engraving. Generally speaking, for harder wood, higher power and speed are needed to ensure sufficient scoring depth and efficient scoring speed. The longer laser B1 series machine has a power of 20W-40W, uses an upgraded 32-bit motherboard, and has an engraving speed of up to 36000mm/min. It can engrave harder materials; for softer wood, lower parameters are required to avoid damage to the wood surface. Excessive charring or heat damage. Several models in the Longer Ray5 series range from 5-20W and are better suited for engraving and cutting softer woods.
  • Pre-treatment: Proper pre-treatment of the wood material before laser engraving can improve the engraving effect. This involves sanding the surface of the wood to remove any unevenness or wood fibers that may be present, ensuring a smooth surface. In addition, applying appropriate carving primer is also an effective way to improve the effect of engraving. It can enhance the smoothness and contrast of the wood, making the carving pattern clearer and details more prominent. Through these pre-processing steps, a more ideal foundation can be provided for subsequent laser engraving work, thereby ensuring that the final engraving effect is more satisfactory.
  • Carry out testing and calibration: Before officially engraving, it is recommended to engrave some test samples first. With these test samples, you can calibrate and adjust your machine to ensure engraving accuracy and consistency. When testing, be sure to pay attention to the engraving, including aspects such as clarity, depth, and detail. If any problems are found, make timely adjustments and corrections to the machine to ensure the quality and accuracy of the final engraving result. In addition, test samples can also be used to evaluate the engraving effects under different parameter settings so that the best parameter combination can be selected for formal engraving. This ensures you get a satisfactory engraving finished product and improves work efficiency.
  • Safety Precautions: Be sure to pay attention to safety when using the laser engraving machine. Especially when working with wooden materials, a number of precautions should be taken to ensure safety. First, be sure to wear standard protective glasses and gloves to avoid damage to the skin and eyes caused by laser radiation. Secondly, the work area should be kept well ventilated to reduce the health effects of harmful gases and dust generated during the laser engraving process. In addition, regular cleaning of the laser engraving machine and the surrounding environment to ensure that the equipment is in good working condition is also an important step to ensure safety. By strictly abiding by safe operating procedures, safety risks during the laser engraving process can be effectively reduced and the health and safety of operators can be protected.

The above provides key tips and considerations for achieving precise laser engraving of wood materials. Longer are definitely a good helper for making wooden decorations. So far, it has released two series of machines, the RAY5 and the Laser B1. The RAY5 series engraving machine is equipped with a 0.08*0.08mm compressed laser spot, which focuses more on energy and perfectly combines simplicity and accuracy, making it an ideal choice for beginners entering the world of engraving and cutting. At the same time, the Laser B1 series machines, with engraving speeds up to 36000mm/min, stand out with their powerful functions and cater to the needs of experienced creators who are proficient in engraving and cutting technologies.

Longer brand laser engravers adopt advanced technology and stable performance, which can meet a variety of different engraving needs and provide excellent engraving effects. In addition, the Longer brand provides users with a full range of after-sales service support with a professional attitude, including timely technical support and maintenance guarantees to ensure the smooth progress of the engraving work. Choosing a Longer brand laser engraving machine not only helps to present the creator's creativity, but also improves the user's craftsmanship and achieves better engraving achievements.

By products-tutorial | March 19, 2024
Longer Nano: 12W Portable Laser Engraver: Affordable, Powerful, and User-Friendly
Nano más largo: grabador láser portátil de 12 W: asequible, potente y fácil de usar

En los últimos años, la industria del grabado láser ha sido testigo de una evolución notable, pasando de máquinas engorrosas de tamaño industrial a variantes elegantes de escritorio que caben cómodamente en pequeños estudios y espacios de trabajo personales. En medio de esta transformación, el costo ha sido a menudo una barrera, y los grabadores láser de alta calidad suelen ser dominio exclusivo de los profesionales dispuestos a invertir significativamente. Ingrese al grabador láser Longer Nano, un dispositivo que se destaca en el mercado por combinar asequibilidad con características de nivel profesional.

Disponible en dos modelos, el de 6 W para el creador ocasional y la innovadora versión de 12 W para usuarios avanzados, el Longer Nano abre nuevos caminos como el primer grabador láser portátil de su clase del mundo. Está diseñado para abrir las puertas del grabado láser de alta calidad a un público más amplio, superando el ruido del mercado con su precio competitivo y su funcionalidad inigualable.

Al introducir tecnología avanzada que normalmente se encuentra en modelos de gama alta en un paquete rentable y fácil de usar, el grabador láser Longer Nano está destinado a revolucionar la forma en que los aficionados, artistas y pequeñas empresas abordan el grabado. Exploremos las capacidades y características que hacen de Longer Nano una herramienta esencial para los creadores en un panorama creativo en constante evolución.

Grabador nanoláser más largo: características y hechos

El grabador láser Longer Nano ha sido reconocido como una innovación significativa en el mercado del grabado láser portátil. Ofrece tecnología avanzada y precisión superior en dos versiones: un modelo de 6 W y el primer modelo de 12 W del mundo, ambos destinados a proporcionar soluciones de grabado potentes y asequibles.

El 12W Longer Nano se distingue por su portabilidad, alta eficiencia y rápida velocidad de grabado, lo que lo convierte en el dispositivo más rápido en el sector del grabado móvil. Cuenta con una precisión de lente de campo excepcional de 0,02 milímetros, lo que garantiza detalles complejos y claridad en cada grabado.

Además de la unidad principal, Longer Nano ofrece un conjunto de accesorios, que incluyen un kit de extensión giratorio para objetos cilíndricos, un kit de extensión para ampliar el rango de trabajo, una carcasa para seguridad y extracción de humo, una fuente de alimentación portátil para funcionamiento en exteriores y un Purificador para filtración de humos y olores.

En términos de especificaciones, el Longer Nano Pro tiene un peso bruto de 4,1 kg y un peso neto de 2,6 kg. Su láser de diodo de 12 W y 450 nm es capaz de grabar un área de 100 x 100 mm que se puede ampliar a 100 x 300 mm con los kits de extensión. El ancho de corte del dispositivo es inferior a 8,5 mm y ofrece conectividad a través de Wifi, USB y APP.

También admite una variedad de formatos y sistemas de archivos y es compatible con múltiples opciones de software de grabado, como LightBurn y LaserGrb, así como LongerBurn, que fue el software desarrollado internamente por Longer. Esta integración perfecta con software de primer nivel mejora significativamente la experiencia del usuario, lo que da como resultado una armonía perfecta entre hardware y software.

El Longer Nano destaca por su versatilidad, capaz de grabar en una variedad de materiales, incluidos madera, metal y cuero, y capaz de cortar madera de hasta 8,5 mm de espesor. Su compatibilidad con plataformas de software líderes como LightBurn y LaserGrbl, así como con la aplicación LongerBurn, facilita una experiencia fácil de usar.

En cuanto al rendimiento, el grabador es reconocido por su versatilidad en el manejo de materiales, precisión y velocidad, con una precisión de grabado de hasta 0,02 mm y una velocidad de hasta 2200 mm/s. En términos de aplicaciones, Longer Nano es capaz de personalizar una amplia gama de artículos, desde petacas y tazas de vino hasta posavasos de madera, lo que demuestra su adaptabilidad tanto para fines personales como comerciales.

Accesorios

  • Kit de extensión rotativa: Los componentes rotativos incluyen principalmente trozos, módulos de soporte, diferentes mordazas, etc., que se utilizan para grabar objetos como copas, termos, tazones, anillos, bolas, etc.
  • Kit de extensión: El kit de extensión se utiliza principalmente para ampliar el rango de trabajo de Nano. Se puede ampliar a 100*300 mm y está diseñado con escalas y accesorios para facilitar la alineación y fijación durante el grabado por lotes.
  • Caja: El tamaño de la caja es 685*370*560 mm, lo que tiene suficiente espacio para un nanograbador y extensiones giratorias o deslizantes. Está fabricado con materiales duros ignífugos y es plegable. Está equipado con un ventilador 12038 y un tubo de escape de humo de 100 mm, que puede extraer rápidamente el humo y el polvo y se puede conectar a un purificador de aire para filtrarlos; también cuenta con múltiples ventanas de observación para la observación en tiempo real del proceso de grabado.
  • El paquete puede instalar toda la máquina para facilitar su transporte: la funda de transporte está hecha de tela y plástico, en la que se puede acomodar un Nano Pro, lo que facilita el transporte de toda la máquina.
  • La fuente de alimentación móvil puede funcionar 3H: cuando se utiliza Nano en exteriores, la fuente de alimentación móvil puede alimentarlo y proporcionar a la máquina de grabado más de 3 horas de tiempo de trabajo.
  • Purificador: El purificador tiene múltiples capas de material filtrante. Cuando se utiliza junto con el recinto, puede filtrar eficazmente más del 99% del humo y los olores.

¿Qué viene con las series de grabadores láser Nano y Nano Pro?

  • Motor principal*1
  • Soporte de elevación eléctrico*1
  • Cubierta protectora*1
  • Gafas * 1
  • Paño de vidrio*1
  • Abrazaderas de posicionamiento y tornillos de mariposa*2
  • Cable de CA/adaptador de corriente*1
  • Cable de datos tipo c*2
  • Regla*1
  • Cepillo * 1
  • Tablero de tilo * 2
  • Tarjeta de visita*5
  • Papel kraft*2
  • Guía de inicio rápido*1
  • Kit de herramientas

Kit de extensión rotativa

  • Trozo*1
  • Módulo de soporte*1
  • Cable USB*1
  • Mandíbula de un solo paso*3
  • Mandíbula de doble paso*3
  • Componentes de perno*3
  • Kit de herramientas*1
  • Guía de inicio rápido*1

Kit de extensión de corredera

  • Host de extensión de diapositivas*1
  • Regla activa*2
  • Accesorio*3
  • Cable USB*1
  • Guía de inicio rápido*1

Especificaciones técnicas

Nano Pro más largo

Peso bruto: 4,1 kg

Peso neto: 2,6 kg

Tipo de láser: Láser de diodo de 12 W y 450 nm para Nano Pro (láser de diodo de 6 W y 450 nm para Nano)

Área de trabajo: 100 x 100 mm, con kits de extensión 100 x 300 mm

Velocidad: hasta 2200 mm/s

Ancho de corte: <8,5 mm

Conectividad: Wifi, USB, APP

Formato de archivo: jpg, bmp, png, dxf, svg, ai, tiff, etc.

Sistema de soporte: Windows, MAC, Linux

Software: Lightburn, LaserGrbl, aplicación LongerBurn

Potencia: 12V 6A

Precios

El Longer Nano tiene un precio de $299, mientras que la versión mejorada Longer Nano Pro está disponible a un precio exclusivo de solo $499. Este modelo mejorado promete aún más potencia y capacidades, lo que lo convierte en una opción irresistible para quienes buscan un rendimiento de primer nivel en sus proyectos de grabado láser.

La asequibilidad de estos dispositivos es notable y ofrecen un alto valor por la inversión. El proceso de configuración se describe como sencillo, lo que permite a los usuarios comenzar a grabar rápidamente. El Longer Nano está diseñado para ser fácil de usar y está dirigido tanto a principiantes como a usuarios experimentados.

El Longer Nano y el nuevo Nano Pro son excelentes opciones para cualquiera que busque invertir en un grabador láser de alta calidad sin gastar mucho dinero. Y en comparación con el Nano, la ventaja del Nano Pro es que es más fácil de cortar y más versátil. El valor que ofrecen por su precio los hace ideales para muchas aplicaciones diferentes, lo que los convierte en una opción potencial para cualquier entusiasta creativo o profesional que busque mejorar su oficio.

Casos de uso y ejemplos de aplicaciones

Frasco de vino personalizado

Tazas personalizadas

Posavasos de madera grabados por lotes

En resumen, Longer Nano y su variante Pro se caracterizan por ser herramientas asequibles, potentes y versátiles para proyectos creativos, que ofrecen capacidades de grabado de calidad profesional a una amplia audiencia. Estos productos están disponibles para su compra en Kickstarter, con ofertas de paquetes adicionales de Longer para los primeros usuarios.

By products-tutorial | March 11, 2024